Showing posts with label paint. Show all posts

Saturday, February 18, 2017

Complete Bathroom

Our bathroom....  is done!  We have a tub.  We have a huge shower.  We have a new vanity with two sinks and a big, mirrored medicine cabinet.  K is so relieved, and we both love this room. Baby V is also thrilled about the tub.


Storage on the left

Deep tub with storage ledge and spacious niche


Wednesday, January 18, 2017

Shower Tile

K has made huge progress on the bathroom tile in the last few days.  Most of the tile wall behind the vanity and the tile in the shower is in. 


Vanity wall


I chose a marble tile for inside the niche, and K wasn't sure about it.  But now that it's installed with the aluminum edging, I think she likes it.  I really like it-- there are little hints of purple and blue and yellow in the stone and I think it coordinates with the floor tile and the wall paint.


After K cleaned up for the day, we showed Baby V the nightlight on the ceiling fan and let him crawl around and explore the room.  <3


Looking at the blue nightlight on the ceiling fan


Tuesday, January 10, 2017

Bold Bathroom

We're going really bold with our main floor bathroom.  We're using a vibrant green-blue paint and some interesting floor tile.  It's really fun!


The paint is similar to our blue kitchen paint, but more green.  The two colors actually look really nice together.  This Swedish seaweed soap was sort of my inspiration for the color-- I have always loved this package.


For the floor tile... I had my eye on this pattern for a while.  K and I talked about going bold with either a fun wallpaper or a bold tile on the floor.  The bathroom is fairly small, so it seemed possible to splurge on something fun in there.  And the pinwheel floor tile was what we decided on.


We decided to stay with white tile on the vanity wall and in the shower.  K decided she wanted the vanity wall to be all tile, and we chose to have them stacked instead of staggered, like she did with the tile in the kitchen.  On the vanity wall we chose a fairly basic subway tile.  And in the shower we have a larger subway tile.  K made the call to use aluminum edging with the tile, too.

She's been working on this non-stop.  She took a bit of time off work so that she could "knock this out."  The tiling is hard work, physically, but I know it's been satisfying for her to see the changes happening each day.

Thursday, December 10, 2015

Mudroom Storage

K felt like taking on a "smaller" project in the house.  Now that it's winter, we're using our mudroom a lot more for all our big coats and boots, for K's warm work clothes.  And we've thought a lot more about what we'd like to have in there for storage-- coat hooks, hanging rod, shoe storage, and cupboard space.

There has always been a lot of storage in this mudroom.  There are a few big, very deep cabinets, two skinny cabinets that hold only smaller things, and two nice-sized drawers.  There's a hanging rod with some open shelves above.  K made a matching Formica countertop for this area, too.


It has worked pretty well for us, but we would like to have more storage for shoes, some bins for each of us, and ideally a place to sit when we're putting on shoes/set our bags/set the kiddo down while we get coats on, etc.

After discussing all that, K worked out a plan to use this whole wall for storage, and still be able to use some parts of the other walls for storage, too.  There should be enough space to do it all.

For now, she pulled out the cabinets and she'll soon begin installing the new storage.  We have cabinet materials that match the kitchen, and we do have enough chrome pulls left to put in this room, too.


Hello again, green linoleum!

Thursday, May 7, 2015

Getting So Close in the Kitchen

The kitchen is coming along!  The doors are on all the cabinets, along with all the hardware.  I love how the chrome pulls look with everything. Now we need to make decisions on paint and tile, and we think we know what we want to do.

For the paint, I had always been thinking of green.  Especially once I saw the old paint color-- I really wanted to replicate that color.

But now that we have the appliances and counters installed, K had me look at a blue paint that she had leftover from a project.  And this blue paint looks really nice with all of it.  I've also compared this blue paint and green paint chips to the dishes we'll be using, and I think the blue will be the better way to go.

I've been collecting Fire King Jadeite dishes for years.  I have a lot of bowls and platters that I love, which were packed away during the years that we were renting.  I have a few pieces of their Azurite, too. Once the kitchen is done, I will get those all out of storage and use them again. 

And a few years ago, I bought a huge lot of the dishware I've always wanted-- the Blue Heaven pattern from Royal China.  The blue paint will look so good with this pattern. 

Jadeite, Azurite, and Blue Heaven

There's a bit of the color we're considering on the right side of the sink in this photo

Monday, February 9, 2015

Clean & Calm Bedroom


We have our bedroom back!  The floor is refinished, the walls are repaired and painted, the ceiling is painted, the outlets have been replaced to code, windows painted, stained trim and base added, curtains re-hung.

New nightstands and a new bed-frame to follow, along with new door hardware and a new bedroom door.  The original door was too damaged to paint and save, so it was just easier to pull the whole thing out and get it out of the way for the floor guys.


The room is calm and clean, and after about a month of sleeping in our basement and at our neighbors' house-- the bed feels huge!  I think we both slept funny last night-- it was almost like we were sleeping in unfamiliar surroundings. 

Here is what the room looked liked when we bought the house:


We had primed over the red walls pretty soon after moving in, but that's how it stayed for at least 2 years afterwards.


I just LOVE how the floors turned out.  The color is so rich and all the detail in the wood grain shows so vibrantly.

Oh, and did I mention that our trim was FREE?  K found a bunch of it at the side of the road somewhere, pulled out of a 1950s home.  K said it was a pain in the butt to sand and re-stain, but once they were installed, we are both really happy with the results. 

Friday, January 16, 2015

Room Craziness


It's been a rough week.  Whew.  Poor K is wiped out...  I can't keep up, either!  We've been working on the walls and ceilings in our rooms with hardwood floors, in order to get those walls before the floor guys come in to do the refinishing on Monday.

So, patching, mudding, sanding, painting our plaster & lathe walls.  Trying to repair years of damage and neglect.  It's totally working-- the walls look 100 times better!  It's just a LOT of work.

K used a sprayer to paint all our doors and windows, which were previously all a very industrial-looking tan (which we're SO sick of!)  We figured this would be a big improvement until we replace the windows, and visually, it is definitely much better!

Newspaper & painter's tape = cheap stained glass

Living room window, mid-taping
Post-spraying

She also sprayed all our vent covers, just so we didn't have to go out and buy all new ones right now, on top of all our other expenses.  Some of them were painted weird, just like our trim, and some were just old-looking.  Now, they may not all look perfect when you look closely, but they sure look better. 


Repairing progress in Baby's room

Above, the baby's room now has a smooth painted ceiling, painted windows and doors, and wall repair is mostly complete.  This room will have painted white trim around the windows and doors.  The other rooms will have stained wood trim.


Our room has a newly painted ceiling, painted walls, painted windows and closet doors.  The door to our room was too damaged, so we'll need to get a new one.  We decided not to mess with the texture on our ceiling.  I guess the look of it grew on us over these last couple years. But it was so much dingier than we had realized-- once K got painting it with the bright white paint, it was like, "WOW!"  It looks so clean and crisp, and the chandelier looks even nicer now.  Yay!

And ohhhhh, the living room.  I'm in love.  Seriously... we've never had a usable living room, in all the time we've owned the house.  For a few days, here and there, we've set up a sitting area when we needed to, but it was always on top of a big sisal rug, on top of the ram board from when we were working on the ceiling.  And there was always wrapped-up bookshelves in the corner, and storage stuff against the wall.  So, just never an actual "living room."
But it's already so pretty.
I'm so excited!

Living room, in progress
The ceiling and coves are smooth, painted, and gorgeous.  The windows are sprayed, which is a huge improvement.  K had to do some major repairs on the entryways to the room because the plaster had gotten nicked away over the years.  She built them back up, so now the corners are sharp and crisp once again.  And the walls, though still in progress, already look sooo much better.  :-)

Rough week, true, but it's so fantastic to see this progress and know we'll have actual finished rooms SOON!


Wednesday, March 26, 2014

Laundry Room Part 2


It's official--  the laundry room is now one of the nicest rooms in our house.

We've got big changes in the works, right now-- K will be starting her own contractor business, like... right now.  She'll have her license at the end of the week and already has a couple jobs lined up.  So that means we really, really need to get things in order here.  #1: She needs a GARAGE!  In order to do this well, she needs space for all her tools and stuff to be organized.  It's not just about our house rehab anymore.

For the last couple days, she worked on going through all her stuff that was stored in the basement and got rid of a lot of stuff, organized all the rest.  And yesterday she cleaned out and painted almost the entire laundry room!


New paint on the walls, new paint on the floor.  And she used some left over turquoise paint on our little storage room door and the shelves above the washer.  


For reference, here's what the room looked like before:

BEFORE

BEFORE


Saturday, November 30, 2013

Painting My Office Ceiling - Part 1


Here's the thing with this office--  The wood in here is beautiful.  Even with a thousand staples and nails in the walls and ceiling, it's still so pretty.  The color is warm, golden, and I love how the sunlight looks in here.  But the wood just sucks up any bit of light.  The one ceiling fixture only illuminates the middle of the room, even though it has three bulbs.  I have two other lamps and two other hanging lights elsewhere in the room, and when they're all on it's OK in here.  But it's still difficult to do any art or sewing projects with the light that's here, and I want this room to be more functional.

I have gone back and forth a hundred times on whether or not to paint the ceiling in here.  And if so, which parts?  Just the middle, or the sides, too?  Or leave it as it is-- pretty honey-colored paneling that matches the knotty pine walls...   Once daylight-savings came this fall, I really got my answer.  There is NEVER enough light in here.  If I want there to be more light, I need to paint the ceiling.  I won't touch the knotty pine walls, but I need some white on the ceiling to help the light reflect through the room better.

Since the test primer stuck really well, I got started on painting the ceiling today.  It's late and I'm too tired to continue, and... I'm almost done.  There are a couple areas that are tough to get to, because I didn't move my stuff far enough away.  And the ceiling over the staircase is going to require some creative ladder-ing.  K will get some ladders set up for me later so that I can do that part.


Taping and plastic everywhere, and lots of painting by hand....  I'm trying to leave the two strips of trim unpainted, so there are all those edges to paint carefully. 

There were also quite a few things that needed to be removed from the ceiling before I could paint...
The first thing I did right away last year after we got the house -- there were about a thousand staples and pushpins and nails that needed to be removed from the walls and ceiling.  The previous tenants had obviously papered every surface in here.

Staples with tiny bits of paper...  Everywhere.

Then there were the letter stickers on the wall and ceiling.  Brilliant gems such as "Jazzer Size," "Fun Wasp Life," "Oops I Pooped," and "Golly G."  Actually, I think it's funny that I didn't take those off until now!  I guess I just got used to seeing them.


And the last thing were these mirror circles, stuck on the slope of the wall.  I didn't mind seeing them, and they actually reflected light from one of my lamps.  But after prying them off the wall, I want to kill whoever put them up there!  The adhesive has gotten SUPER sticky, and I'm pretty sure I've lost a layer of skin to the back of these things.  And I sliced my index finger with my razor scraper when I was trying to pry off a circle.  Not all of the glue came off the wall, but luckily the primer covered it up pretty well.

EVIL glue behind those mirrors!

The priming went really well, though.  I'm using a low-VOC oil-based primer, some that K had in the house already.  It's sticking very well, and covering everything I hoped it would -- there were random paint and marks in quite a few places.


I can't wait to be done with this project, because my room is a mess.  And I'm anxious to see what it will look like.  With just the flat primer, there's already a huge improvement in the light in here!

And K's been working all evening on shelving in the basement storage room.  She's re-using a bunch of the wood from the old work-bench.  I can't wait to see how it turns out!


Friday, November 29, 2013

Basement Storage Room - Part 1


Four-day Thanksgiving weekend seemed like the perfect time to get a project done...  Or at least started.   K got the idea that she could work on organizing the storage room in the basement -- getting rid of some things, organizing her tools.  And that turned into an all-out demo, cleaning and painting of the room!


This is how the room looked when we walked through the house the first time.  The tenants took the dresser with them, but the workbench was built in.  The carpet, the posters over the windows, and all the paint cans stayed and waited for us, too.  And once we moved in, we just put more stuff in there -- air conditioners, cabinets, tools...  Since it's out of the way, it was an easy place to stash things.

Workbench mid-demo

K was going to keep the workbench, because it was a nice size and she could either use it as a workbench or for storage.  But it was built right next to the walls and at some point there was moisture down there, so the wood had gotten a little rotten and weak.  It seemed like it would be better to start over, plus we could really clean the wall behind it and the floor beneath it.  Surprisingly, there wasn't much underneath the workbench-- just a lone flip flop and an empty condom box.  


First came vacuuming all the dirt and old spiderwebs, and then we did a good scrubbing with bleach & water.  The walls did have water-barrier paint on them, already, but it was dirty and the bottom had old mold on it.  The floor was mostly painted at some point, too.

We put new water-barrier paint on the walls, and caulked around the windows to keep spiders from crawling into the house that way (we can see lots of old nests on the other side of the window!)  And since the windows aren't functional right now --they are covered with insulation and siding-- we decided to paint over them, to cover the caulk and so we don't have to stare at the insulation.  Someday, when we replace the siding, maybe we will replace the windows with some that seal and insulate better.

The floor, as it was drying

Painting the floor was as big an improvement as painting the walls, I think!  The room is brighter and doesn't feel gross and dirty anymore.  We'll be putting some shelves and cabinets in there for storage. 


Tuesday, June 12, 2012

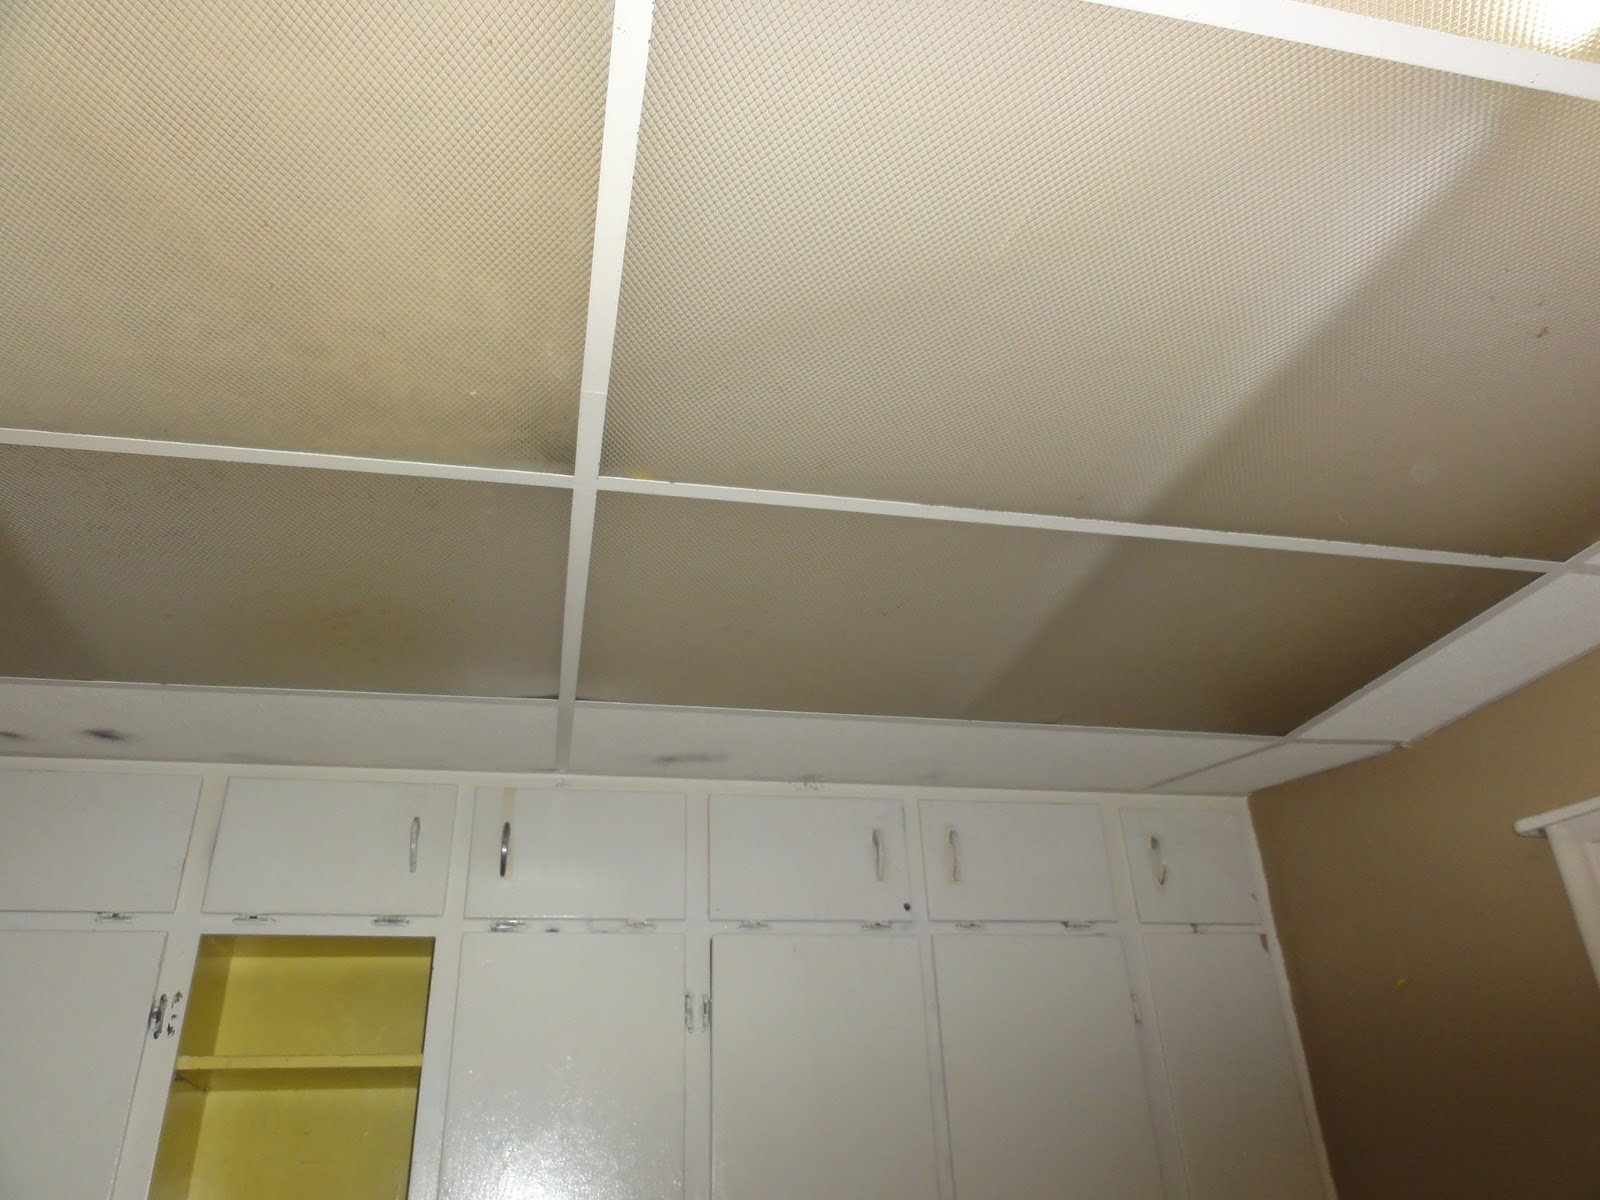
Kitchen Drop Ceiling


Our kitchen has an industrial-looking drop ceiling...  I understand that this place was a rental for ages, and florescent tube lighting is energy-efficient.  And judging by how many broken light fixtures there are in this house, it's possible that the kitchen lighting just didn't stand a chance.  Not sure when this ceiling and lights was put up, but it doesn't appear to be original.


I started pulling the panels down pretty quickly after we moved in.  And then today we pulled down the metal frames.  The ceiling is a good 4 inches higher now, with patchy paint and small holes every few inches.  The cool thing is that we can see a green paint near the top of the walls-- possibly the original paint in the kitchen?  The color is really pretty!  Very exciting, too, because I have been imagining doing green in the kitchen.

Metal frame coming down...  Popcorn ceiling in the kitchen, too.  Green paint in the middle seems to be much older than all the other paint.


Happy!  Taking down the panels!